
Your dehumidifier and heated airer work hard to keep your home dry, fresh, and energy-efficient—especially during the UK’s damp winter months. But without regular cleaning and maintenance, these appliances can lose performance, increase energy use, and even develop mould or odours.
This guide explains how to clean and maintain both devices properly, helping you extend their lifespan, improve drying speed, and reduce condensation indoors.
This article is part of our Laundry & Drying Efficiency hub, focused on practical UK advice for drying clothes indoors faster, avoiding damp, and keeping energy use low.
💨 How to Clean a Dehumidifier (Step-by-Step)
Dehumidifiers are essential for managing indoor moisture, especially when drying clothes indoors. But over time, they collect dust, bacteria, and mould spores—especially in the water tank and filter. Regular cleaning keeps them running efficiently, prevents odours, and protects your home from hidden damp.
Here’s a thorough step-by-step guide to cleaning your dehumidifier safely and effectively:
1. Unplug the Unit and Remove the Tank
Always start by unplugging the dehumidifier from the wall. This prevents electrical hazards and allows you to clean safely. Remove the water tank and pour out any remaining water. If your model has a continuous drain hose, disconnect and rinse that too.
2. Wash the Water Tank Thoroughly
Use warm water and a mild detergent to clean the inside of the tank. A soft sponge or cloth works best—avoid abrasive scrubbers that could scratch the plastic. Rinse thoroughly to remove soap residue and leave it to air dry completely. This step helps prevent mould and bacterial growth inside the tank.
3. Clean the Exterior and Air Vents
Dust can build up around the intake and exhaust vents, reducing airflow and efficiency. Use a microfibre cloth to wipe down the outer casing. For vent grilles, a soft brush or vacuum nozzle can help remove trapped dust without damaging the unit.
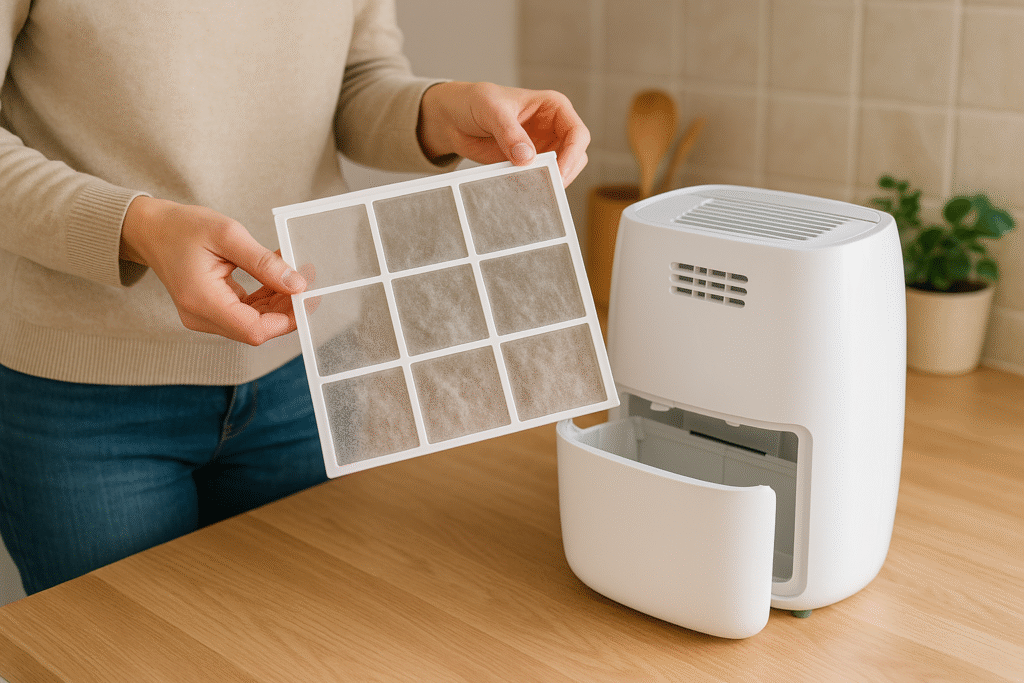
4. Clean or Replace the Air Filter
Most dehumidifiers have a washable filter located behind a panel. Remove the filter and rinse it under lukewarm water. Let it dry fully before reinserting. If the filter is discoloured, damaged, or smells musty, it’s time to replace it. Check your model’s manual for compatible replacements.
5. Inspect Internal Components (If Accessible)
Some models allow access to coils or fan blades. If safe to do so, use a soft brush to gently remove dust. Never use water or cleaning sprays on electrical parts. If coils appear rusty or mouldy, contact the manufacturer or a qualified technician.
6. Dry All Parts Before Reassembly
Moisture left inside the unit can cause electrical faults or encourage mould growth. Make sure the tank, filter, and any cleaned surfaces are completely dry before plugging the unit back in.
🛠️ Bonus Tips for Dehumidifier Maintenance
- Run in a closed room to trap moisture and improve efficiency
- Keep 30cm clearance around the unit for proper airflow
- Empty the tank daily during heavy use—even if not full
- Use a hygrometer to monitor humidity and avoid overuse
- Clean monthly to prevent odours and maintain performance
- Store in a dry cupboard during summer or when not in use
🔥 How to Clean a Heated Airer Safely
Heated airers are a low-energy way to dry clothes indoors, but they still need regular cleaning. Dust, lint, and moisture can build up on the bars, joints, and electrical components—especially during winter when they’re used frequently. A clean airer dries faster, runs safer, and lasts longer.
Here’s how to clean your heated airer properly:
1. Unplug and Let It Cool Completely
Never clean a heated airer while it’s plugged in or warm. Wait until it’s fully cool to avoid burns or electrical risks. Place it on a flat surface where you can access all sides easily.
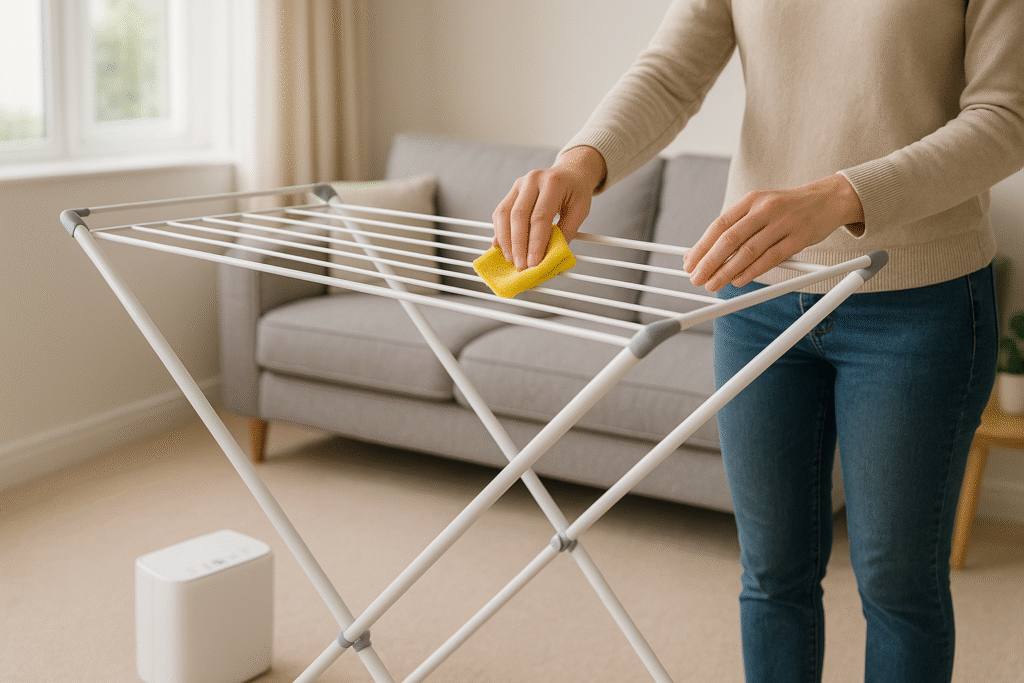
2. Wipe Down the Heating Bars
Use a damp cloth with a mild detergent to clean each bar. This removes dust, lint, and any detergent residue from clothes. Avoid soaking the cloth—excess water can seep into joints or electrical areas. For stubborn marks, use a non-abrasive sponge or a vinegar solution.
3. Clean Hinges, Joints, and Folding Mechanisms
Dust and lint often collect in the moving parts. Use a soft brush or vacuum nozzle to gently clean these areas. Pay attention to corners and crevices where moisture can linger and cause rust.
4. Inspect for Rust, Damage, or Loose Screws
Check all joints, screws, and the power cord for signs of wear. If you spot rust, clean it with a rust remover and apply a protective coating. If the cord is frayed or the plug feels loose, stop using the airer and consult the manufacturer.
5. Dry Thoroughly Before Use
After cleaning, leave the airer open to air dry fully. Moisture left on the frame can cause corrosion or electrical faults. Never plug in a damp airer.
🧺 Heated Airer Maintenance Tips
- Don’t overload—spread clothes evenly for better airflow and faster drying
- Use a fitted cover to trap heat and reduce moisture in the room
- Avoid placing near soft furnishings or walls to prevent damp buildup
- Fold and store carefully to protect joints and wiring
- Inspect the plug and cord regularly for damage or wear
- Clean after every few uses, especially during heavy laundry weeks
🧽 Recommended Cleaning Accessories
To make maintenance easier, consider these UK-available products:
- Vileda Microfibre Cloth Pack – Ideal for wiping down heated airers and dehumidifier exteriors without scratching surfaces
- Ecozone Anti-Bacterial Appliance Cleaner – Safe for cleaning water tanks and filters, helps prevent mould and odours
🧭 Keep Your Setup Dry, Fast & Condensation-Free
Once your dehumidifier and heated airer are clean and running efficiently, the next step is making sure your room layout and moisture control strategy are just as smart. These guides build on what you’ve learned and help you create a truly effective indoor drying setup:
- 💧 How to Stop Condensation When Drying Clothes Indoors (Quick Fixes That Work) – practical ways to reduce moisture, prevent mould, and protect your home while drying laundry.
- 🛋️ Where to Put a Heated Airer or Dehumidifier for Best Results (Room Layout Tips) – discover the best room layouts and positioning strategies to speed up drying and cut down on energy use.
Together, they’ll help you dry clothes faster, avoid damp, and keep your home fresh all winter long.
✅ Final Recommendation: Clean Devices Work Smarter
Regular cleaning and smart maintenance help your dehumidifier and heated airer perform at their best. You’ll enjoy faster drying, lower energy bills, and a fresher home environment—all while extending the life of your appliances.
For best results:
- Clean your dehumidifier monthly and monitor humidity levels
- Wipe down your heated airer regularly and inspect joints and cords
- Use gentle cleaning tools and avoid harsh chemicals
A few minutes of care each month keeps your indoor drying setup efficient, hygienic, and hassle-free.
💨 Want to dry clothes faster, cheaper, and smarter—especially in small UK homes?
Explore our Laundry & Drying Efficiency Hub, a curated resource packed with expert tips, energy-saving gadgets, and clever solutions for indoor drying. From heated airers and compact dehumidifiers to smart laundry routines that actually work, this hub helps you cut costs, save space, and stay ahead of the damp.

About The Author – Andrew Marshall
Andrew Marshall is a Scottish homeowner and the creator of Save Wise Living. He shares practical ways to reduce energy bills, improve home efficiency, and make everyday household routines cheaper and simpler.